How to 3D Animate
How to 3D Animate: 3D animation is a dynamic and impactful technique for creating digital graphics that appear three-dimensional, offering a realistic depth and spatial effect. Unlike 2D animation, which is limited to flat, horizontal, and vertical movements, 3D animation incorporates the Z-axis, allowing objects to move in and out of the screen. This method is widely used in films, video games, simulations, and virtual reality to craft immersive experiences that captivate audiences.
To learn how to 3D animate effectively, you need to follow several essential steps. From conceptualizing and modeling characters and environments to rendering and finalizing the animation sequences, understanding these fundamentals is crucial for bringing your creative ideas to life. Whether you are aiming to produce a short film, a video game character, or a virtual environment, grasping the basics of how to 3D animate will help you achieve your goals.
Step-by-Step Guide to How to 3D Animate
- Concept and Planning
- Conceptualization: Before getting into the technical details of how to 3D animate, it’s important to have a clear vision of your project. This involves brainstorming the storyline, characters, and the overall aesthetic. Create a storyboard to outline the sequence of events visually.
- Script and Storyboard: Draft a comprehensive script detailing the dialogue, actions, and timing. A storyboard helps visualize each scene and plan camera angles and transitions, ensuring a structured approach and a clear vision for your animation.
- Modeling
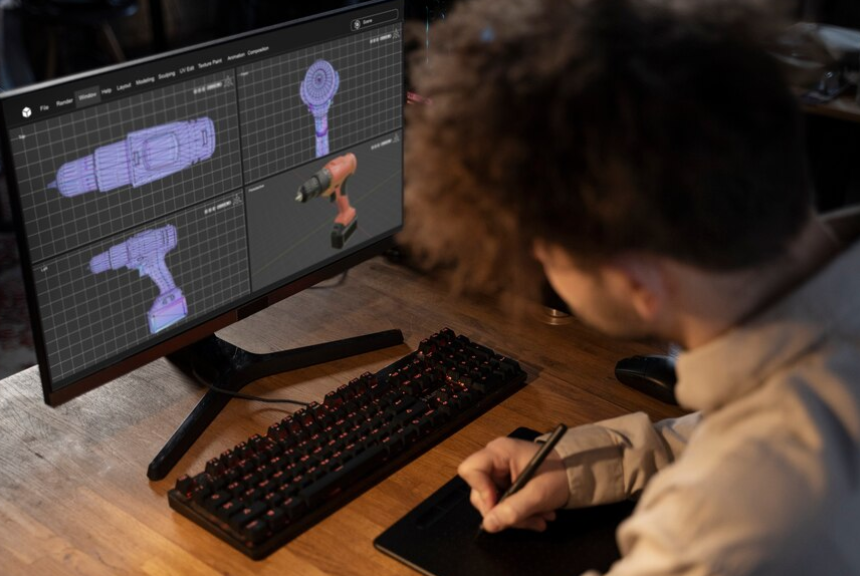
- Create 3D Models: Use 3D modeling software like Blender, Maya, or 3ds Max to create digital models of your characters, objects, and environments. This step includes constructing basic shapes and refining them into detailed models.
- Texturing: Apply textures to your 3D models to add color and surface detail. Texturing involves mapping a 2D image onto the 3D model’s surface to achieve realistic skin, clothing, and environmental textures.
- UV Mapping: Unwrap the 3D model to create a 2D representation for accurate texture application. UV mapping ensures textures fit correctly on the model without distortion.
- Rigging and Skinning
- Rigging: Add a skeleton or rig to your 3D models. Rigging creates a hierarchical structure of bones and joints that allows the model to move and pose realistically, which is essential for animating characters.
- Skinning: Attach the 3D model (skin) to the rig (skeleton). Skinning involves defining how the mesh deforms as the bones move, ensuring the model behaves naturally during animation.
- Animation
- Create Keyframes: Begin animating by setting keyframes, which are specific points in time where the model’s position, rotation, and scale are defined. Keyframes are the foundation of the animation sequence.
- In-Betweening: Use in-betweening (or interpolation) to create smooth transitions between keyframes. This process helps in generating fluid and natural movements by filling in the gaps between keyframes.
- Animation Curves: Adjust animation curves to fine-tune the motion. Curves represent changes in movement over time and can be edited to refine the speed and flow of the animation.
- Lighting and Rendering
- Set Up Lighting: Proper lighting is crucial for achieving a realistic look. Experiment with different light sources and their placements to enhance the mood and depth of your scene.
- Rendering: Render your animation to produce the final output. Rendering involves generating a sequence of images based on the 3D models, textures, lights, and camera angles. This process can be time-consuming and may require advanced hardware or cloud rendering services.
- Post-Processing: After rendering, you might need to perform post-processing to add effects, adjust colors, and edit the final animation. Software like Adobe After Effects can enhance the rendered footage and add finishing touches.
- Export and Finalize
- Export Animation: Export the rendered animation to a video file format such as MP4 or AVI. Ensure that the resolution and quality meet your project’s requirements.
- Review and Revise: Examine the final animation and make any necessary revisions. Check for inconsistencies, glitches, or areas needing improvement before finalizing the project.
Frequently Asked Questions (FAQs)
- Q1: What software is best for beginners in 3D animation?A1: Blender is highly recommended for beginners as it is free and offers a comprehensive set of tools for modeling, animation, and rendering. Other beginner-friendly options include Autodesk Maya and Cinema 4D, though they require a subscription or purchase.
- Q2: How long does it take to create a 3D animated short film?A2: The time required to create a 3D animated short film varies based on the project’s complexity and team size. Simple short films might take a few weeks to months, while more complex projects can take several months to over a year.
- Q3: Can I learn 3D animation on my own, or do I need formal training?A3: Many animators are self-taught through online tutorials and courses. However, formal training can provide a structured learning path and professional feedback. Both methods are valid depending on your learning style and career goals.
Conclusion
Mastering how to 3D animate combines creativity with technical skill. By following these steps—concept and planning, modeling, rigging, animating, lighting, rendering, and finalizing—you can transform your animation ideas into reality. With dedication and practice, you’ll be able to create animations that are both visually stunning and narratively compelling. Whether you’re a hobbyist or an aspiring professional, learning how to 3D animate opens up endless possibilities in digital storytelling.


